
Introduction
 If you’ve ever used a handheld bidet, you probably already know about some of its advantages.
For those who don’t have an idea what is a handheld bidet.
A device that is held in the hand and it is used for cleaning your bottom after using the toilet. It’s often used in place of toilet paper, and can be an alternative to a traditional bidet. Handheld bidets are easy to use, and can provide a deeper cleaning than toilet paper alone. For people who are looking for a more hygienic way to stay clean, a handheld bidet is a great option.
Handheld bidet sprayer offers a number of advantages over toilet paper.
- They are much more hygienic and gentle on your skin because water can quickly and effectively remove any residual waste without the need for harsh rubbing.
- They can also be especially helpful for those with hemorrhoids and other anal health concerns.
- It can also be used for cleansing before anal sex.
- In addition, handheld bidets sprayer for toilet are also more convenient for people with mobility issues. To use toilet paper, you need to be able to reach down and around your backside—something that can be difficult or impossible for some people.
All you need to do is squeeze the trigger and let the stream of water do its work. There’s no more need for toilet paper, and they leave you feeling cleaner and more refreshed.
So why not install a handheld bidet in your RV? Installing a bidet in your RV is not as difficult as it might sound. And if you’re thinking you don’t have room in your RV for a handheld bidet? You might be surprised! It can be installed even in the smallest of RVs. And it can make a world of difference in your travels. All you need is a few simple tools and a little bit of time.
Here’s how to do it:
 If you want to install a handheld bidet in your RV, you’ll need to obtain a spray nozzle and a flexible hose. You can find these items at most hardware stores, or you can purchase a dedicated kit from an RV supplier.
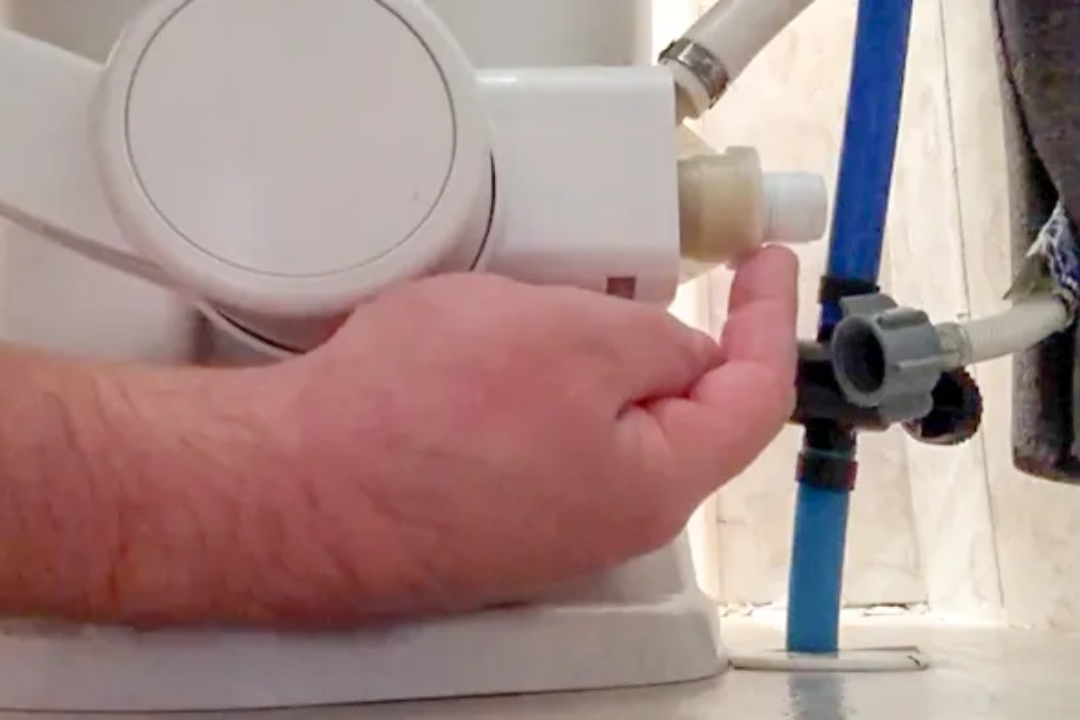
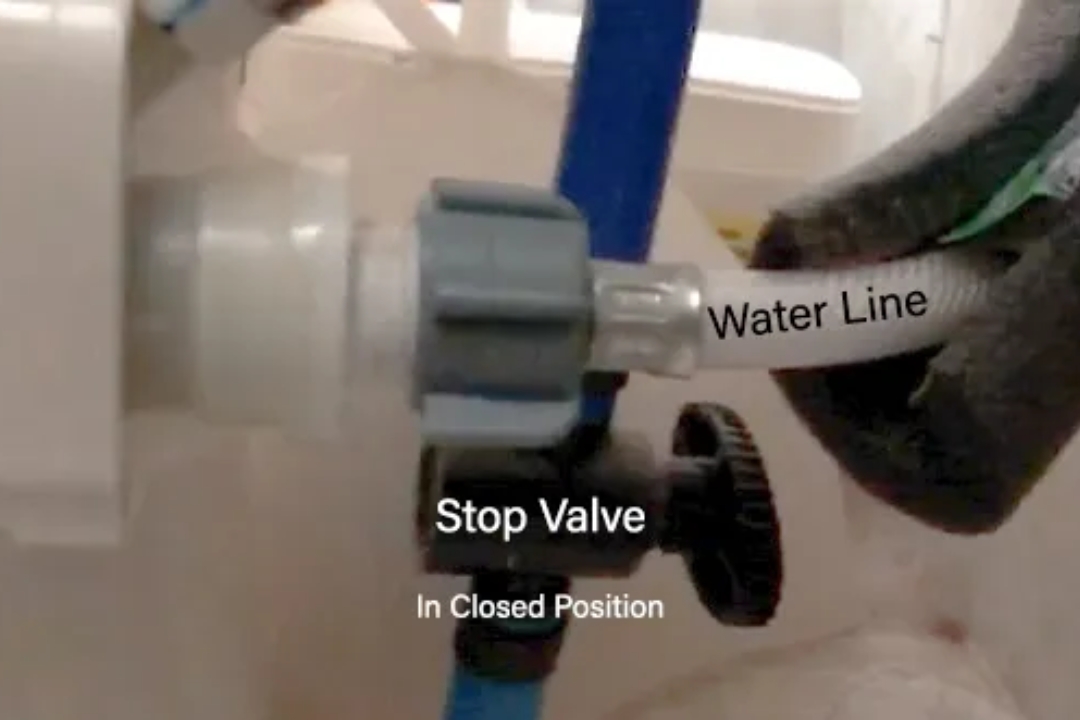
- First, You’ll need to turn off the water pressure to your RV. This can be done easily done by disconnecting the shore connection hose. It will prevent any unwanted water from entering your RV.
- Check if the 12-volt water pump is switched off. This will ensure that there is no water flowing through the system when you’re making connections. There’s a chance that water could leak out and cause damage to your RV If the pump is turned on. You can skip ahead to the next step if there is an isolation tap fitted to this line. Otherwise, you’ll need to shut off before proceeding by simply turning the tap clockwise as far as it will go.
- Disconnect the flexible water pipe from the back of the toilet. You may need to use a wrench to loosen the connection. Be careful if the pipe is attached directly to the water control component called a vacuum breaker. If that’s the case, hold the pipe steady with another pair of grips while breaking the seal of the nut.
Breakers Installation
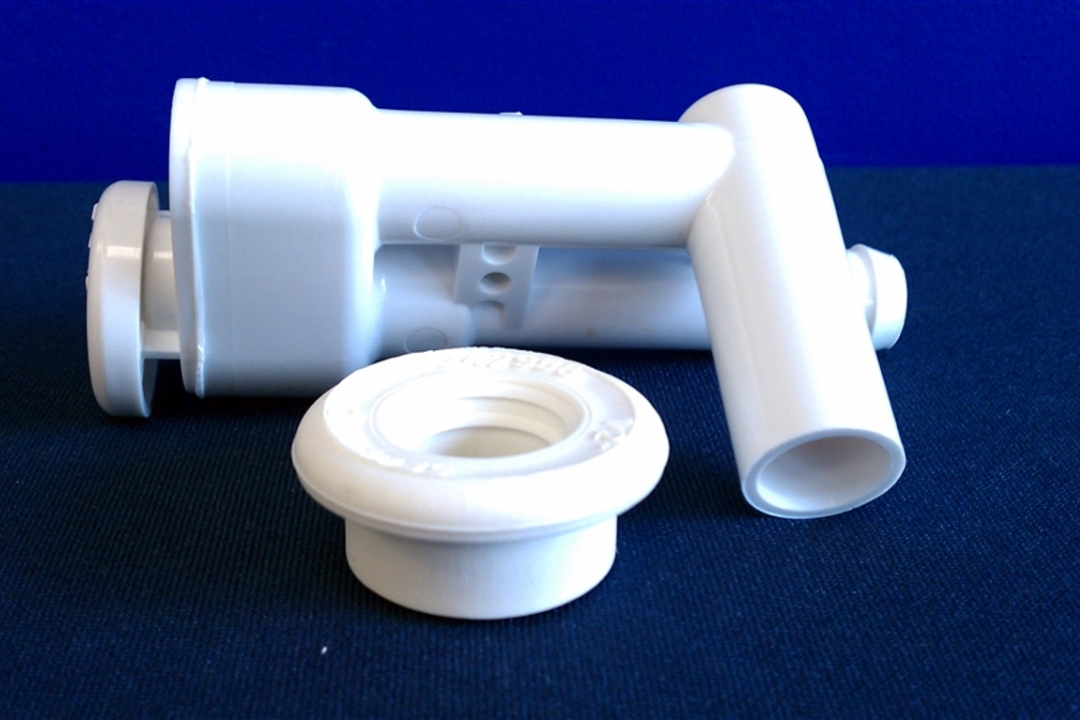 This breakers protects the water supply from contamination from backflow and back siphonage. Vacuum breakers are not particularly strong, there’s a risk of breaking them if you apply too much force if not properly removed. This can cause problems with the proper functioning of the vacuum breaker. It is important to be careful when removing a vacuum breaker so that you do not accidentally break it.
- Attach one in-line openings of T-fitting to the rear of the toilet or the vacant upstream inlet of the vacuum breaker. Then attach the opposite in-line opening to the flexible water pipe. Now attach the open end of the new sprayer nozzle’s hose to the right-angle opening of the T-fitting. Use the wrench to thread the components together by turning them clockwise until they are tightly connected. Be sure to support the vacuum breaker when applying pressure to any components.
- Restore the water pressure back. And check if there are any leaks that can be seen around the joints. If there are still leaks that can be seen, simply give an additional turn until the leaking stops. It’s important to check for leaks. Even small leaks can cause big problems with water pressure in the future. Be sure to tighten all connections properly to avoid any issues.
- Install a retaining clip on a wall or somewhere near the toilet if you don’t want the head of the new sprayer simply lying on the floor. Locate a spot where you want to install the clip. It should be close to the toilet so you can plug in the bidet. A retaining clip is a small piece of hardware that attaches to the side of your RV and provides a place to store your handheld bidet when it’s not in use. Plus, it keeps your bidet from rolling around and getting lost in your RV. You can find retaining clips at your local hardware, as they may have the clips in stock. You can also try online retailers or specialty stores that sell RV parts and accessories. It usually comes with an attaching screw.
When you’re on the road in your RV, the last thing you want to worry about is where you’re going to find a bathroom. A handheld bidet can be a lifesaver in this situation. Not only will it save you from having to use a dirty public restroom, but it will also save you from having to search for a place to stop and clean up.
Can you put a bidet on an rv toilet?
Yes, it is possible to install a bidet on an RV toilet. However, it’s important to consider a few factors before proceeding with the installation:
-
Space and Compatibility: RV toilets often have limited space and different designs compared to standard household toilets. Before purchasing a bidet, ensure that it is compatible with your RV toilet model and that it can be installed without interfering with other components or fixtures in your RV bathroom.
-
Water Supply: Check the water supply options in your RV. Bidets typically require a water source for the spray function. Depending on your RV’s plumbing system, you may need to consider the availability of a dedicated water line or find a bidet model that can connect to the existing water supply.
-
Power Source: Some bidets may require an electrical connection for features like temperature control, water heating, or additional functionalities. Make sure your RV can provide the necessary power source or opt for a non-electric bidet if electrical compatibility is a concern.
-
Installation Considerations: Installing a bidet in an RV may involve modifications or adaptations due to the unique nature of RV bathrooms. Ensure that you have the necessary tools and expertise or consider seeking professional assistance to properly install the bidet without causing any damage or leaks.
-
Portability and Storage: If you plan to use the RV for travel and move frequently, consider the portability and storage aspects of the bidet. Some bidet models may be easily detachable or foldable, allowing for convenient storage during travel.
Before purchasing a bidet for your RV toilet, it’s recommended to consult the specific RV manufacturer’s guidelines and possibly reach out to the bidet manufacturer for compatibility and installation recommendations. This will ensure that you choose the right bidet model and have a successful installation experience.